An investigation in Shaders
Kenneth Harper

The Game

To develop my skills in visual game effects I worked on a 2D puzzle platformer by the name of Ellumi the Fire Sprite, where the character traverses through various levels with increasingly complex puzzles. The goal was to develop environmental props and effects that added to the overall visual style of the game.
My role
The game needed burnable objects in order to create many of the puzzles involved, and as such, needed burning visual effects that would be convincing enough to properly convey that an object is in flames. This meant developing a shader that would create the desired effect.
.png)
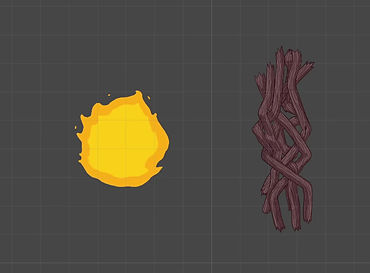
The Burning Problem
.png)
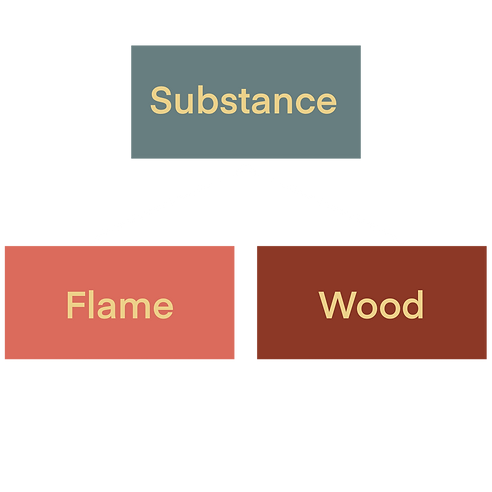
The Substance Hierarchy as a Tree
Implementing the burn involved developing a "substance hierarchy" through which collision detection would then determine what interactions must occur. The hierarchy consisted of a "Substance" parent class, with an instance variable "Type", a getter method GetSubstanceType() to return the instance variable, and a virtual method SubstanceInteract(Substance otherSubstance) that gets overridden in its child classes.
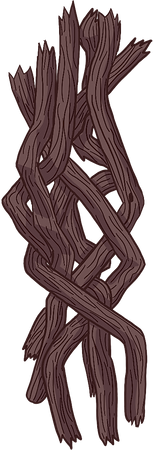
The two child classes "Flame" and "Wood" are the classes involved in the burn interaction. Each declares the "Type " variable in its Start() method, and then has the method OnCollisionEnter2D(Collision2D other) that checks if the colliding object has the component "Substance" and if so, calls the SubstanceInteract(...). To cause burning to occur, the "Wood" script has a boolean value "IsBurning" to, as the name suggests, declare whether the object is or is not burning.
Problems arise
If the object colliding with a "Wood" object is of the Substance Type "Flame" then the "IsBurning" variable would be set to true, causing visuals to then indicate the object is burning.
The coding for the simple interaction up until this point had been fairly straightforward, however, the visual side proved challenging. To start, the object needed to slowly disappear, but in a manner that would be easily read as burning.
The Render Issue
I started by first researching how to develop the "dissolving" effect. I discovered that a common approach is through the use of shaders, however, this proved to be an issue, as in the standard build for Unity 2020.3.13f1 shaders are solely for 3D objects, and it is a 2D game.
Fortunately, there is a module available for download from Unity itself, called the Universal Render Pipeline (URP). This is an experimental module that can be used for lighting, shaders, and other visual effects in 2D. I downloaded the module and then created a URP Asset object, and a 2D Renderer asset that the URP Asset uses. Then, in Project Settings > Graphics > Scriptable Render Pipeline Settings, I added the URP Asset so the project would use the object as a base for rendering instead of the standard rendering asset.

Where the Asset is Placed in Project Settings
The Shader
Now that 2D objects could have shaders, the shader needed to be created. In order to develop the shader, I used Unity's "ShaderGraph" which works on a series of interconnected nodes that, depending on the nodes and connected values, can create visual effects over an already rendered sprite.
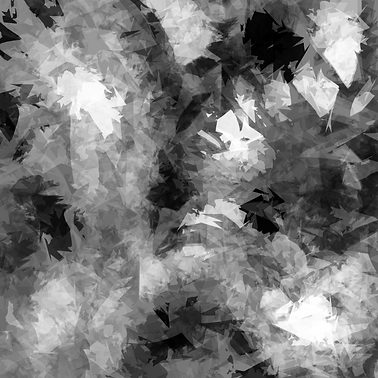
To start, I created a texture in grayscale using an App called Procreate, that would be used as a base for the shader. The texture is necessary to determine which areas of the sprite will become transparent first, where the brightness of a pixel in the texture is essentially linked to the opacity, making any white pixels become transparent first and black pixels become transparent last.
By using the output of the "BurnTexture" node's red value, and inputting it into a Step node, where a parameter "Fade" is also used as input, I could increment each pixels red value by increasing the value of "Fade". Then I took the output of the Step Node and used it for an input in a Multiply node, which also takes the alpha (opacity value) of the base sprite as input. This outputs to the alpha of the rendered sprite, making more and more pixels transparent the higher the "Fade" value at playtime.
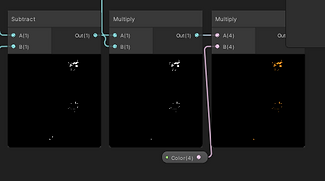
Thus far only the transparency is altered, meaning that the effect is just a "slow dissolve". To fix this, I added another branch of nodes to create an orange edge on the dissolved areas. For this, I added another Step node like the first, but instead of "Fade" being a direct input, Fade is first subtracted in a Subtract node. Then, the output of the first step node is subtracted from the output of the second, leaving an edge. This edge is then inputted into a Multiply node, where a parameter "Color" is also taken as input, making the edge the color specified by "Color". This colored edge is then outputted into an Add node where it's added to the RGB value of the base sprite, and then the output of the Add node is inputted into the RGB of the rendered sprite, thus adding the edge to the object at playtime.
.png)
The texture used to create the burn effect. (Called BurnTexture in the Graph)
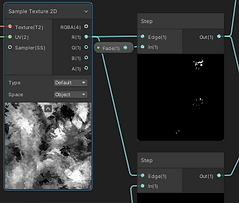

The Texture and Step Node
The step, main texture, and multiply nodes

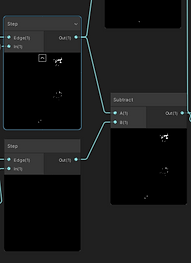
The Texture, Second Step, and Subtract Node
Both step nodes subtracting
Color multiplication Node
Shader in practice
After developing the shader, it was time to implement the shader. I started by changing the material of the object to the shader, and then realized this left an orange spot, as the edge needed to be rendered ahead of the dissolve. Thus, instead I stashed a reference of the "Dissolve" shader within the "Wood" script.
I then used the stashed reference to change the material to "Dissolve" when "IsBurning" is set to true, and then update the value of "Fade" to decrease until the object is completely transparent, and then destroy the object. At this point, I originally thought I was done, until I added another "Wood" object. I realized that the shader was being updated universally, resulting in objects not completely burned appearing as though they were. To fix this, I used the stashed reference of "Dissolve" and instantiated a copy that was then applied to the object. This way, no two "Wood" objects would have the same "Dissolve" shader applied.

Update Function in the Wood script

SubstanceInteract
Function in the Wood script
Results
A big part of shaders is breaking each grand problem down into easily implemented pieces. Whether it was disappearing pixels, the edge, or every object with the material dissolving, each problem simply required breaking down what needs to happen and implementing the smaller pieces. The results speak for themselves on the left, where the burning effect is shown.